The mighty heroes of DOTA come to the fight with four (or
more) powerful abilities. But the creatures of the land have tricks of the own!
From the lowly Spiderite to the mighty Roshan, the various non-hero units in
DOTA have a plethora of special abilities. Some are well known, while some are
obscure. I would like to take the time and analyze them all to give you a
better grasp of the options available, and how to take advantage of those
powers.
The creep abilities frequently start out more powerful than
what heroes can do in the early game, and lose effectiveness as the game goes
on. Unlike heroes, they don’t know how to level up – or maybe they just never
live long enough. Also quite a few of them are not smart enough to use their
best abilities on their own; it usually takes divine persuasion or some
vile mind-control magic (or worse) to unleash those talents.
In part 1, we will look at the small and medium Jungle
creeps. Those creeps generally don’t have the raw power of the larger units,
and their abilities are more complex or do less damage. But some of the best,
and less known, tricks live in what could have been 17 gold.
 |
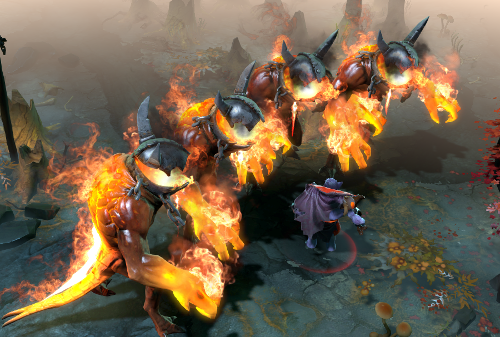
| The whole gang! |
Small Camps
Kobolds are the the basic creeps of the jungle, having a
combination of little HP, armor, damage and no special abilities. The notable
exception is the Kobold Task Master.
 |
| Kobold Taskmaster |
 | Speed Aura
Movement Bonus: 12% of current speed
Radius: 900 |
This aura is deceptively powerful – the increase is based on
percentage, meaning that faster heroes get even faster. At 12%, this is more
than twice more powerful than Drum of Endurance. Speed can be an incredibly
decisive factor at any point in the game, so this is a useful aura to have when
ganking or pushing as a team.
For Chen, Enchantress and Helm of the Dominator users, this
is a weak and fragile creep that is best kept behind just to provide his aura.
It’s something you want to bring along with you, but never put him on the front
lines as he is weaker than your average melee creep. For Doom, this really
depends on what’s necessary; this can be a great aura to compliment the
occasional Aghanim upgrade to doom, and to provide that extra mobility for the
entire team.
 |
| Hill Troll High Priest |
Hill Trolls are another more-or-less generic camp, sometimes
appearing with the Kobold Taskmaster and other times with the Hill Troll
Priest. The best feature of the Hill Troll Priest is that he is the ugliest,
lowest resolution creature in the game. Other than that, the Troll Priest is a
famously annoying creep as he is likely to stay in the camp healing – or even
doing nothing – and mess up pulls and stacks. He however comes with two
interesting abilities of his own.
|
| Heal
Heal Amount: 15
Range: 350
Mana Cost: 5
Cooldown: 0.5 Sec |
A minor heal, this ability is only really useful in the
early game to help with laning. It’s cheap and spammable, but only heals 15hp
per 5 mana used. It also has really wonky programming, and the troll will heal
the closest unit usually ignoring heroes. This is something you would bring
into the lane behind the lines, and have your teammate fall back to the troll
to get healed. He does provide 15hp per 1.5 seconds.
By the way, there is a rumour that the troll will not auto-heal anymore. That's not true; as a matter of fact, he will heal over any other action such as moving or attacking. The catch here is that the healed target needs to be within the spell's short range; the troll will not seek out distant targets.
|
| Mana Aura (Suggested Icon)
Mana Regeneration: 2/sec
Radius: 900 |
The less known ability of the troll, he provides a 2 mana
per second aura – this is 3 times more effective than Ring of Basilius. Early
on, this can provide a really nice mana boost to a jungler or in a lane. It
falls of quickly, does not stack with Basilius/Aquila/Vlad’s, but it is one of
the best mana regen sources in the early game. Even if it does not deserve its
own icon.
Other than that, the Troll abilities are more useful the
earlier the game is. He is slow, weak and ugly but has the potential to keep a
hardliner or a mid player alive, the jungler from going back to base. If you
push in the early game, his aura can be great. Otherwise, forget about this
creep after about 20 minutes have
passed.
 |
| Vhoul Assassin |
Vhoul Assassins are an interesting creep in that they are
incredibly dangerous to creeps, but are relatively harmless to heroes – to a
large part, due to their poison.
|
| Envenomed Weapon
Damage: 2/sec
Duration (Hero): 10 sec
Duration (Creeps): 20 sec |
A weak poison, it does last for quite some time. While
active, it deals 2 magical damage per second to all units and lasts 10 seconds
on heroes, 20 on creeps.(20/40 damage total) It does not dispel regen items,
and can rarely overpower natural regeneration. All in all, it’s a weak ability
for a hero to have; all it’s good for is for the Vhouls to clear lane creep
waves faster, and to annoy junglers.
 |
| Screw you, Na'ix |
Ghosts are a handy camp. The little guys are pure cannon
fodder, but the large Ghost has a surprisingly powerful slowing attack
|
| Frost Attack
Slow (movement): 20%
Slow (attack): 20%
Duration: 1.5 sec |
This is a non-magical, non-orb ability that applies a 20%
movement and attack slow to all units and heroes it hits for 1.5 seconds.
Notably, this also applies to units that are magic immune such as a raging
Lifestealer.
 |
| Seriously. Screw you, Na'ix. |
This ability is more powerful than an Orb of Venom (which is 12%
on melee) and is closer to Skadi in its effectiveness (35%). Given an average
hero speed of 300, this completely nullifies anything other than Boots of
Travel. For example, 300 speed hero with 50 speed boots, this would reduce this
hero to 280 movement speed on hit.
This is handy to have as a Chen or Enchantress when ganking
heroes, especially in situations where you need right-click damage from
yourself or your allies. For a Doom, this is a great ability to have when you
are ahead early and have potential for kills; other ganking abilities like
Warstomp or Thunder Clap have really high mana costs, while this one does not
and it synergizes well with Scorched Earth.
 |
| Harpy Stormcrafter |
Last but not at all least of the small camps is the Harpy
Camp. The smaller harpies have nothing special about them, while the Harpy
Stormcrafter is one of the most unique creeps on the list.
|
| Chain Lightning
Damage: 140
Range: 900
Jumps: 4
Reduction per jump: 25%
Mana Cost: 40
Cooldown: 4 sec |
This is a famous lane winner, as pioneered by some
professional games. It has a long range of 900, deals 140 damage on hit, arcs
on up to 4 targets with reduced damage, and has a low mana cost and cooldown.
This is absolutely spammable, and can annihilate heroes early and even into the
mid game.
To put some numbers on it – the Harpy has a mana pool of
540, meaning the chain lightning can be cast 13 times. This is 1820 magical
damage to a single target in just 52 seconds, at a range exceeding most attack
and cast ranges. If the spell arcs, it deals 105/79/59/44 damage to consecutive
targets – for a grand total of 427 magical damage if all arcs connect. In an
ideal situation, the harpy can deliver 5552 magical damage to the lane over its
mana pool.
To add to the spell’s power, the Harpy has a natural sight
range of 1800 during both the day and night; this is the same sight range as
Nightstalker at night, and farther than a regular ward. Overall, if you can get
a harpy and bring it to a lane, you easily win that lane at least for the
moment being. This can also be used by a doom player who has difficulty farming
a lane; this would both kill creeps, and quickly push enemies out of their
lane.
 |
| I AM BECOME HARPY, DESTROYER OF LANES |
By the way, this is about on par with Zeus’ Arc Lightning.
It does not bounce to as many targets, but deals about the same raw damage as a
Zeus’ level 4 spell. Of course you can’t spam it as much, and you don’t get the
bonus of the Static Field, but it’s mostly free damage. Not even to mention
that this ability is approximately 300% more likely to frustrate and infuriate
the other team. It’s mostly countered by players not knowing it exists, or
forgetting to cast it in combat.
Medium Camps
The Satyr Camp – perhaps the most varied ability-wise, the
Satyrs bring a lot of utility that many players overlook in favour of juicier
creeps.
 |
| Satyr Trickster |
|
| Purge
Slow: 100%
Recovery: 20%/sec
Range: 200
Duration: 5 sec
Mana Cost: 120
Cooldown: 5 sec |
The lowly Satyr Trickster is perhaps the weakest of all the
creeps in the jungle, but he possesses one of the more unique spells. Purge is
one of the limited dispelling spells in the game – along with Blood Rage, Demonic Purge,
Unstable Current, Brewmaster’s Storm Dispel Magic, Diffusal Blade and Fortune’s
End from the upcoming Oracle. This operates in exactly the same way as Diffusal
Blade – incurs a massive slow that decays over time, removes many debuffs and
damages illusions. The slow only applies to enemy units, but the purge removes both positive and negative effects.
Notable spells that can be purged: Ghost Walk, Surge, Skeleton Walk, Amplify Damage, Guardian Angel, Track, Aphotic Shield,
Vendetta, Open Wounds, Insatiable Hunger, as well as all forms of Blind, Hex,
Ethereal Form, Silence.
 |
| Excuse Me Sir, Do You Have a Moment to Talk About Obelis? |
This will also deal 400 damage to summons, outright killing
weaker units like Lycan Wolves, Eidolons and more.
In other words, many significant buffs can be dispelled.
Purge can also be used to set up kills as it slows similar to Open Wounds from
Lifestealer. Unlike Open Wounds, the spell can be maintained permanently as the
duration matches the cooldown (5s). It also will remove many buffs that would
otherwise negate open wounds, such as Surge, Shukuchi and Haste. The catch here
is that the spell is expensive (120 mana), has a very short range of 200 (melee
range is 128) and the creep that carries it is very vulnerable and slow.
As a result, the practical application of the ability is
either by doom, or by keeping the creep in the rear to provide dispelling
services when really necessary. If used
by doom, this can guarantee kills on a pick-off, or prevent important buffs
from acting in the late game. If used by others, this is likely to be a rear
support unit.
By the way, in DOTA 1 this ability would get used by the creep (maybe not anymore). You really should be grateful it's gone, a poorly-timed purge can really ruin your day.
 |
| Satyr Mindstealer |
|
| Mana Burn
Mana Drained: Up to 100%
Damage: 100% of mana burned
Range: 600
Mana Cost: 50
Cooldown: 18 sec |
Another utility spell, the Mana Burn is a fantastic ability
only hindered by its cooldown of 18 seconds.
For 50 mana and with a range of 600, this burns 100 mana from the
target. There are certain heroes, like Bristleback, who rely very heavily on
their mana pool and are virtually disabled when the mana is gone. This ability
is useful in winning lanes early on, and securing engagements at a point where
enemies have little mana available to them. A simple example is Queen of Pain –
she is likely to have 300-400 mana in the first few minutes of the game; this
creep can easily halve that in only two casts.
A good use of this for Chen or Enchantress is to send the
satyr into mid/hard lane to help your teammates win that lane; 100-300 mana
lost early on can severely disable someone’s escape or kill potential. For
Doom, this ability can be used early on to severely reduce the amount of threat
the enemy lane can offer, useful in anywhere if Doom is laning.
 |
Centaur Conqueror
The popular kid |
The Centaur Camp is a fairly well-known camp due to the high
desirability of the creep by junglers. The larger Centaur has very high HP, and
good abilities.
|
| War Stomp
Stun (Heroes): 2 sec
Stun (Creeps): 3 sec
Damage: 25
Radius: 250
Mana Cost: 100
Cooldown: 20 sec |
The better known aspect of the Centaur Conqueror, this is a
powerful 2s stun that can become significant when used well, especially in
combination with other hero abilities. It has a short range of 250 (melee range
is 128) and deals a measly 25 damage – but all this is irrelevant as this is a
free stun to the team, and can make a difference between a teamfight won or
lost, an enemy teleporting away and so on.
Of note, this is one of the abilities that the creeps will use on their own. The way it works is if there are 3 or more targets within the casting range, the ability will activate. When jungling, if you'd like to avoid the stun, keep fewer targets in range. Alternatively, you can sometimes bait an enemy hero with their creeps into the centaur, and enjoy the free stun.
|
| Swiftness Aura
Attack Speed Bonus: 15
Range: 900 |
A somewhat minor aspect of the Centaur Conqueror, this is
still a very helpful ability. It will boost the DPS of non-hero units by as
much as 15%, helping with pushing and team fights. It also completely negates
the negative effects of Ancient Apparition’s chilling touch, and further help
heroes that need to hit fast. Then again, who doesn’t?
It’s really hard to overstate the Centaur Conqueror can provide!
Interrupting spells and teleports, negating initiation, securing kills
following your own initiation… A few simple examples are – leaving the centaur
on a cliff and running past it. When the other guys follow, they will not see
the centaur and get stunned. Or, a pesky Slark pounces you – just stomp on his
invisible tail and watch him lose half of his invisibility. You can even keep a
centaur in the back, to run up and annoy anyone with major channeling spells
such as Shackles, Black Hole or Assassinate.
This ability is sometimes picked up by Doom players to
provide that extra bit of ganking power. When caught out of position, 2 second
stun is an eternity. It’s also 265 gold for Doom.
 |
| Ogre Frostmage |
The Ogres are a fun little camp. They have a lot of health
but little damage, give good XP and gold, and carry one of the best abilities
in the whole wide jungle.
|
| Ice Armor
Armor Bonus: 8
Slow (movement): 30%
Slow (attack): 20%
Slow Duration: 5 sec
Duration: 45 sec
Range: 900
Mana Cost: 40
Cooldown: 5 sec |
This is essentially one of Lich’s most important abilities,
but on a lowly creep. It adds 8 armor, slows melee attackers’ movement by 30%
and attack by 20%, has a very long casting range and a tiny cooldown. This is
almost identical to Lich’s level 4 spell! Lich has 1 more armor and half effect
on ranged attacks, but actually costs more and lasts 5 seconds less. The frost
armor is very unobtrusive, and hard to spot at a quick glance – and can
massively increase the durability of any of your heroes. With a duration of 45
seconds and cooldown of 5, it’s easy to have it up on most or all of your team.
Seriously, this spell is fantastic and incredibly underrated.
 |
| About the same thing, really |
For that reason, it’s also a great pick for Doom! This can
actually be more beneficial than carrying the ability on the creep, as the Ogre
himself is disgustingly slow. He is, in fact, slower than the Wolves of
Icewrack. I guess we know what the wolves prey on. This in essence provides
most of the late-game benefit of Lich while still having the rest of Doom’s
toolkit.
 |
| Alpha Wolf |
Wolves have had a surge in popularity lately, as more and
more people are becoming aware of what the aura does.
|
| Packleader Aura
Damage Bonus: 30%
Range: 900 |
This provides an incredible 30% physical bonus damage in a
huge area (900). This is twice the damage bonus from a Vlad’s, and almost as
much as Vengeful Spirit’s level 4 aura. It applies to heroes, lane creeps and
summons vastly increasing the damage of your team. As a result, this makes the
creep very desirable by Chen players and Helm of Dominator users. One thing to
know is the bonus damage is calculated from base damage plus your main stat from
items, not bonus damage from items; your Rapier will not be affected by this.
Because of this ability, the Alpha Wolf is one of the better
pushing creeps, especially early when you rely more heavily on lane creep
damage. He remains useful as the game progresses, but loses strength as the
enemy heroes gain more damage and learn to kill the creeps ASAP. While this is
applicable to all creeps, this is more relevant with the Alpha Wolf who mainly
benefits the team by being alive and nearby.
When jungling, this ability affects all other nearby neutral creeps - including wolves and other spawns. This can make a medium camp surprisingly dangerous; be sure to take this guy out asap if stacking.
|
| Critical Strike
Critical Bonus: 2x
Critical Chance: 20% |
Similar to Lycan’s wolves, the jungle wolves carry a 20%
chance to hit for twice the damage. In other words, this is a level 2
Juggernaut crit for free on the creep. This contributes quite significantly to
their individual DPS – as many junglers have discovered. It’s not very useful
on the creep though, as the wolf is usually brought along for the aura; you
can’t really afford to put it in the front lines to die, regardless of how
great a pusher the wolf may be.
The downside of the wolf is how fragile it is; as a result,
this is another fantastic pick for Doom as his superior survivability and speed
allow the aura to always be present for the team. Many doom players pick up the
Aura/Crit combination early on for ganks – and it works really well with Doom’s
speed, survivability and natural damage.
 |
| Just look at those beady eyes. They brim with hatred for all living things. |
And then, there are Mud Golems. Screw those guys! Hard to
kill, deal decent damage, immune to magic… I don’t even want to talk about
them. They just take up jungle space that could have been any other useful
creep.
|
| Magic Immunity
Effect: Evokes an irrational hatred from Chen, Enigma and Enchantress among others |
 |
| Noooooooooo.jpg |